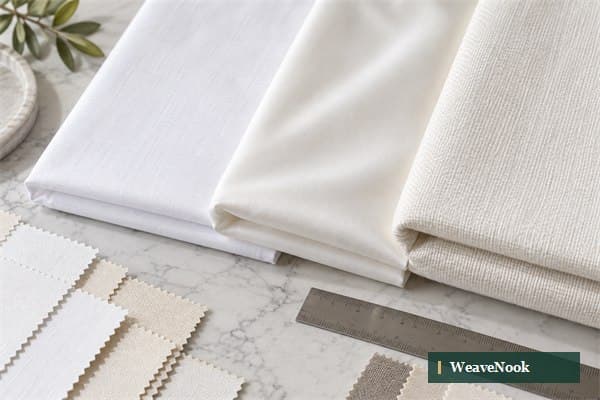
Direct answer: Review fabric feed, thread, needle, fold width and laundering together. Make a controlled sewing trial and compare the hem before and after care rather than demanding a machine adjustment without evidence.
Introduction
A wavy bed-sheet hem can be visible on a freshly pressed hotel bed, and it may become more obvious after washing. Buyers sometimes describe it simply as poor sewing and ask the factory to increase stitch density. Yet puckering can arise from fabric feed, differential tension, thread behaviour, needle choice, folding geometry, finishing or the care route. Changing one machine dial without locating the mechanism can make the next sample worse. The buyer’s best tool is a controlled sewing trial with the real fabric and clear before-and-after observations.
This article explains a bed-sheet hem puckering cause investigation for B2B procurement. It covers sample preparation, comparison variables, laundering, appearance approval and shipment checks. It does not report a WeaveNook factory result or prescribe a universal stitch setting. The production team and buyer should agree a finished appearance reference and a repeatable process for the exact fabric and hem construction.
Start with the intended bed-sheet product range. The sheet skew and bowing guide covers whole-panel alignment; a local wavy hem is a different defect, although fabric direction can connect the two. Do not use a straight centre panel to excuse an unacceptable border, and do not mistake a skewed sheet for puckering along a correctly sewn edge.
Identify the visible pattern before changing settings
Look at where puckering begins
Photograph the hem flat and on the intended bed. Note whether the waviness is continuous, intermittent, confined to a corner or concentrated near a join. A continuous ripple may suggest a systematic feed or tension issue; a short affected section may be a local handling problem. These are hypotheses, not diagnoses. Inspect the reverse and compare the stitched edge with a nearby unstitched fabric section. Record which side was uppermost during sewing.
Check the sheet before laundering and after a standardised care cycle. If the seam looks smooth when sewn but ripples after wash, fabric and thread dimensional response deserve attention. If the waviness is present immediately, investigate cutting, folding and machine setup first. A hot press can temporarily flatten some defects; compare the product in the state the buyer will receive and use. Do not approve a photo taken immediately after special hand-finishing if bulk pieces will not receive that treatment.
Distinguish seam puckering from edge distortion
Uneven fold width, cut-edge variation and fabric bow can create a wavy line even if stitches are balanced. Measure fold depth and compare the hem to the grain. If the material is cut off-grain, a straight stitch path may appear crooked against the print or weave. The CottonWorks shrinkage and skewing overview explains that construction and finishing influence dimensional response; this does not substitute for diagnosing the particular sewing sample.
If the hem contains a decorative stitch, embroidery or piping, separate the base hem from the added operation. The extra yarn and penetrations may alter tension locally. A solution could require a different decoration placement rather than a wholesale fabric change. Record the ordered appearance: a lightly relaxed linen hem may be acceptable in one retail style while a flat, crisp white hotel sheet may require tighter presentation control.
| Symptom | First question | Evidence to collect |
|---|---|---|
| Ripple directly beside stitch | Are upper and lower feeds balanced? | Top/reverse photos and trial seam |
| Wavy folded edge | Is fold width consistent? | Measured hem-depth map |
| Change after washing | Do fabric and thread shrink differently? | Before/after dimensions |
| Distorted corners | Was excess fabric trapped in the turn? | Corner construction sample |
| Variation by roll | Did material properties change? | Fabric lot and finish record |
Design the sewing trial
Use production-representative materials
Cut panels from the intended fabric lot, using the approved direction and width. Use the proposed thread, needle, machine class, presser foot and folder. Record settings so a successful trial can be repeated. The Coats technical discussion of seam puckering describes multiple causes and remedies; use it as an engineering reference, not a claim that one adjustment works for every sheet.
Include a known reference seam and a small number of planned variants. For example, if feed mismatch is suspected, compare a baseline setting with a changed feed arrangement while leaving thread and fold width stable. If thread shrinkage is suspected, hold machine settings constant and compare thread options. Changing feed, thread and fold simultaneously may produce a better-looking result but cannot show which factor was responsible.
Document the trial sheet rather than relying on memory
Assign a code to every variant and record fabric lot, orientation, thread, needle, seam allowance, hem width, stitch length, operator, machine and date. Photograph under similar light and distance, with an identified ruler. Note whether the sample was pressed and how. A buyer should be able to recognise the approved trial months later and ask whether bulk production used the same construction.
The trial need not copy a laboratory experiment, but it should preserve enough control to be useful. If a sewing change reduces puckering while causing skipped stitches or weakened edges, it is not a successful final design. Inspect both appearance and basic seam integrity. Make at least one full-size sheet after promising small swatches; behaviour over a long hem can differ from a short test strip.
Turn the decision into a sample brief
Share the product, target market, planned quantity and bed sheet hem puckering cause criteria. We can discuss a suitable sample and quotation route.
Ask for Product CatalogInclude washing in the approval sequence
Reproduce the relevant care route
Hotel and retail sheets face different laundering conditions. Agree wash, dry and finishing conditions before judging the sample. A home-laundry procedure may be relevant to a consumer product, while the hotel may use a commercial process. Measure and photograph the hem before care, then compare after the specified sequence and recovery. Do not present a favourable pre-wash sample as a promise about post-wash appearance.
Fabric and thread may change dimensions differently. A hem folded on the fabric’s long direction can behave differently from one sewn across it. Assess the relevant grain direction and whether the same hem construction appears at head, foot and side edges. If the sheet is printed or has a coloured border, examine whether distortion changes the visual alignment. A straight edge measurement alone may miss the perceived defect.
Define a visual acceptance reference
Puckering is often judged visually. Agree the viewing distance, light, sheet state and whether the item is flat or on a bed. Retain a physical example or controlled photograph of an acceptable and an unacceptable appearance. Do not invent a numerical grade without a method. If a buyer uses a graded standard, identify it and make sure inspectors understand it. A verbal note saying “no puckering” can be interpreted very differently by production and receiving teams.
The ISO 139 standard-atmosphere description supports consistency for formal textile testing. A factory visual inspection may operate under practical conditions, but should still avoid comparing a damp, freshly pressed sample with a dry, wrinkled one. State the preparation. When an appearance dispute occurs, put both samples into the same condition before deciding which actually differs.

Analyse the underlying production variables
Fabric feed and handling
If the top and bottom layers travel at different rates under the presser foot, one can be eased into the seam. Observe the sewing operation and mark matching points on a test panel. Long sheet edges magnify small differences. Operators may compensate by pulling or holding fabric, creating intermittent distortion. A suitable feed mechanism, folder or handling instruction can reduce variation, but confirm it on the full-length hem and within the quoted production speed.
Do not blame operator skill by default. A fabric that changes hand between rolls, a folder set for another thickness or a worn machine component can produce the same symptom across capable staff. Trace the timing of the defect and compare unaffected production. Corrective action should target a reproducible cause and include maintenance or material control where needed.
Thread, needle and seam geometry
Thread type, size and tension influence a hem’s appearance and strength. Too much tension can gather the fabric; inappropriate thread or needle can create damage or excess seam bulk. However, lowering tension indiscriminately may leave loose stitches. A balanced seam must also withstand the agreed care route. Compare the trial visually and inspect stitch consistency on both faces.
Fold width and number of fabric layers affect the edge profile. A deep double fold can be desirable for a hotel sheet but may be too bulky for a lightweight cloth. If a buyer asks for a different fold, revise finished size and cost; the change consumes fabric and can shift the visible border. A corner mitre may require a separate construction note. The approved drawing should describe these points, not merely show a distant product photo.
Connect development to factory inspection
At first production, compare a full-size sheet to the approved sewn and washed reference. Check hem depth, stitch appearance, corner finish and overall dimensions. Sample across fabric rolls and sewing shifts. If the defect appears only after washing, reserve selected production units for the specified care trial. A factory floor glance cannot prove post-wash appearance, but it can catch immediate process drift.
Classify defects meaningfully. A visible wave along an exposed top hem may have greater customer impact than a slight ripple on a concealed side edge; the buyer should decide that hierarchy. Avoid opportunistic downgrading during shipment inspection. The lot-sampling guide helps set lot boundaries and release authority before defects appear. If rework is proposed, trial its effect on dimensions and appearance rather than simply adding another row of stitching.
If a fabric mill changes finishing, rerun the relevant sewing and wash comparison. The same fibre content and GSM do not guarantee identical sewability. Keep a fabric-lot record attached to the approved hem sample. For repeat orders, a short first-piece approval can prevent a whole run from being sewn with a folder or tension setting carried over from a different sheet fabric.
It helps to distinguish a controlled deviation from an uncontrolled workaround. A sewing team may occasionally press a wave flat, trim an irregular edge or resew a short section. Before allowing that repair in bulk, assess whether it changes hem width, stitch integrity or the final sheet size. Record how many pieces required rework and where they occurred in the run. A small cluster near a machine changeover can point to setup; a persistent high rework rate suggests the approved process is not stable enough. A quote based on a slow hand-corrected sample may not represent scalable production. Buyers should request a pilot quantity sewn at the planned line speed and inspect its distribution of appearance, not just the single best sample selected at the end.
Prepare a usable sourcing brief
Provide fabric construction and finish, finished sheet size, hem width, seam type, corner detail, care route and visual target. Indicate which hem is guest-facing and which tolerances matter after washing. Ask for production-representative sample panels followed by a full-size sheet. Require the supplier to identify any price change from the proposed sewing method or extra finishing step.
A concise trial report should show the baseline defect, variants, changed variables, before/after-care photographs and approved version. Do not demand a generic promise of “perfectly flat forever.” Textile appearance changes with handling and use. Ask instead for a consistent, inspectable result under the named preparation and care condition. The specification should be ambitious enough for the market but precise enough for production.
Frequently Asked Questions
Is hem puckering always caused by thread tension?
No. Differential fabric feed, cut direction, fold width, needle, thread behaviour and laundering may all contribute. Observe where and when the ripple appears, then test one plausible change at a time. A tension adjustment can help in some cases but may create weak or loose stitches if used without diagnosis.
Should the sheet be judged before or after washing?
That depends on the buyer’s intended use and signed specification. For a hotel sheet, post-care appearance may be critical. Record both states if possible and use the actual laundry route. A pre-wash pass cannot be presented as proof that the hem remains flat after repeated care.
Can a swatch approval replace a full-size sample?
No when the long hem and corners matter. Short swatches help isolate process variables, but a full-size sheet reveals accumulated feed variation, grain alignment and bed presentation. Use the swatch to select a likely construction, then validate it on a representative finished article.
What evidence should accompany a corrected hem?
Keep the changed sewing settings, material identity, sample code, photographs, washed appearance and dimensional check. Confirm that stitch integrity and finished size remain acceptable. A statement that the machine was adjusted is not enough to establish the corrected bulk product matches the approved sample.
Conclusion
Bed-sheet hem puckering is best handled as a controlled material-and-sewing problem, not a vague workmanship complaint. Identify the pattern, trial production materials with one meaningful variable at a time, and judge the full-size sheet after the relevant care route. Retain the approved construction and visual reference. That gives buyers a repeatable appearance standard and factories an actionable correction path.
Primary sources and method boundaries
Sources reviewed October 9, 2026. Illustrative calculations and proposed review checklists are not certified test results. Confirm the applicable method, edition and acceptance limits with your laboratory and customer.
Send your project requirements
Email info@WeaveNook.com with sizes, materials, care route, volumes and destination. Project-specific evidence and capability must be confirmed for your order.
Send Your Requirements